A step-by-step, science-backed guide to progressive overload: what it is, how to apply it week to week, and how to troubleshoot plateaus safely.
Calma Path
October 18, 2026
Updated October 18, 2026
The 6 Most Effective Bodyweight Exercises Backed by Biomechanics
A biomechanics-based guide to 6 effective bodyweight exercises for full-body strength. Learn what they train, how to do them safely, how to warm up, and how to progress at home.

Written by
Maya Reynolds
Maya Reynolds is a registered nurse turned wellness educator who specializes in translating clinical research into accessible, everyday health habits. She is passionate about helping people sustainably improve their fitness, sleep, and nutrition without the pressure of toxic wellness culture.
If you have ever felt overwhelmed by the endless list of “best” exercises online, you are not alone. After years of working as a nurse, I learned the hard way that consistency beats complexity. The good news is biomechanics can help you choose a small set of movements that give a huge return on time, equipment, and energy.
Biomechanics is simply how your body produces and controls force. In practice, it points us toward exercises that:
- Use multiple joints (more muscle mass working at once)
- Let you create meaningful tension from stable positions
- Respect common joint limitations (especially shoulders, knees, and lower back)
- Scale smoothly from beginner to advanced without fancy gear
Below are six bodyweight exercises that cover the biggest movement patterns: squat, hinge, push, pull, core stability, and locomotion. You will get form cues, progressions, and a simple way to put them together for a full-body home workout.
Why these six work
From a mechanics standpoint, these movements are “high yield” because they create a lot of muscular demand without needing external load. They also train how your body transfers force across segments. That matters for real life: picking up laundry, climbing stairs, getting off the floor, carrying groceries, and protecting your back during long days at a desk.
A simple filter I use: If an exercise improves your ability to produce force, resist unwanted motion, and keep joints stacked, it is usually worth your time.
Quick warm-up (3 to 5 minutes)
You do not need a complicated warm-up. You do need one that gets joints moving and lets your first work set feel smooth.
- Wrist rocks: 30 to 60 seconds (especially before push-ups and bear crawls)
- Hip hinge drill to a wall: 8 to 10 reps (see the hinge note in the RDL section)
- Bodyweight squats: 8 to 12 reps
- Scapular push-ups or shoulder circles: 6 to 10 reps
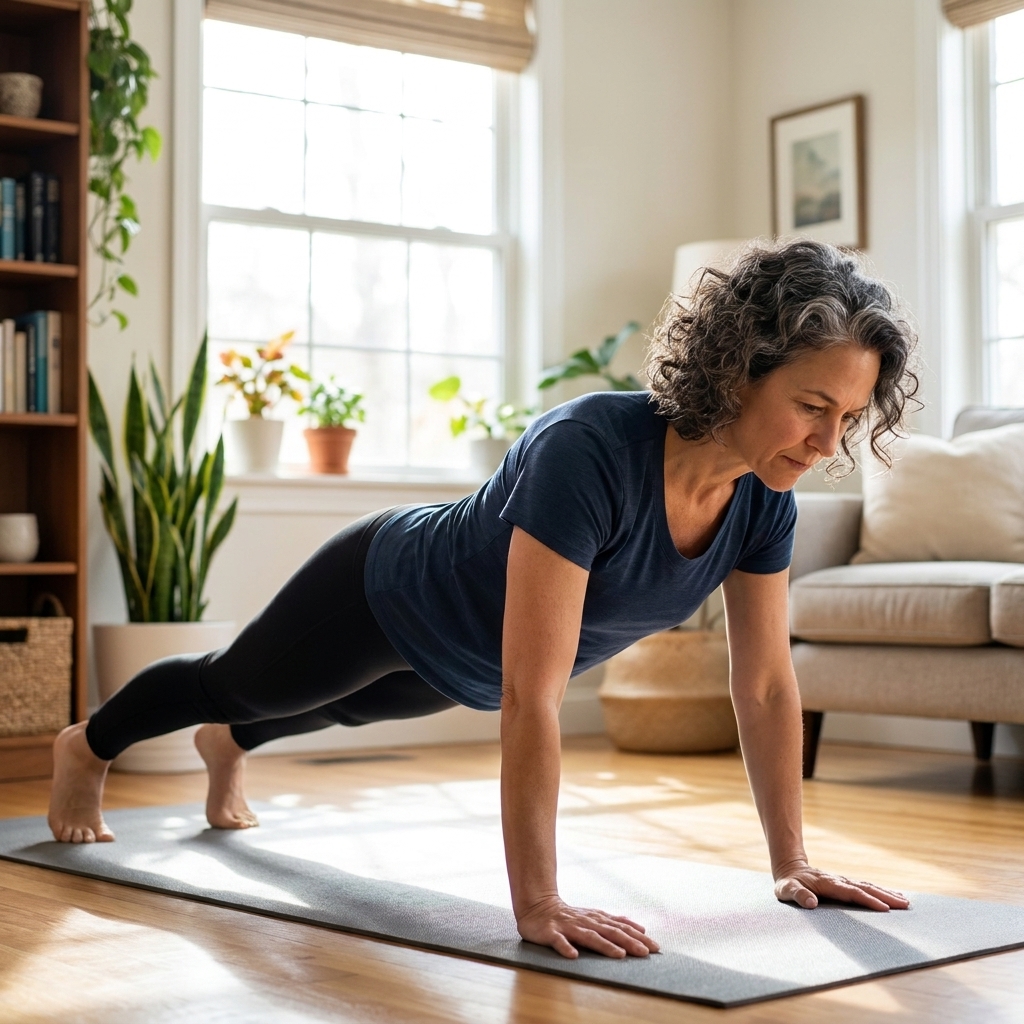
1) Push-up
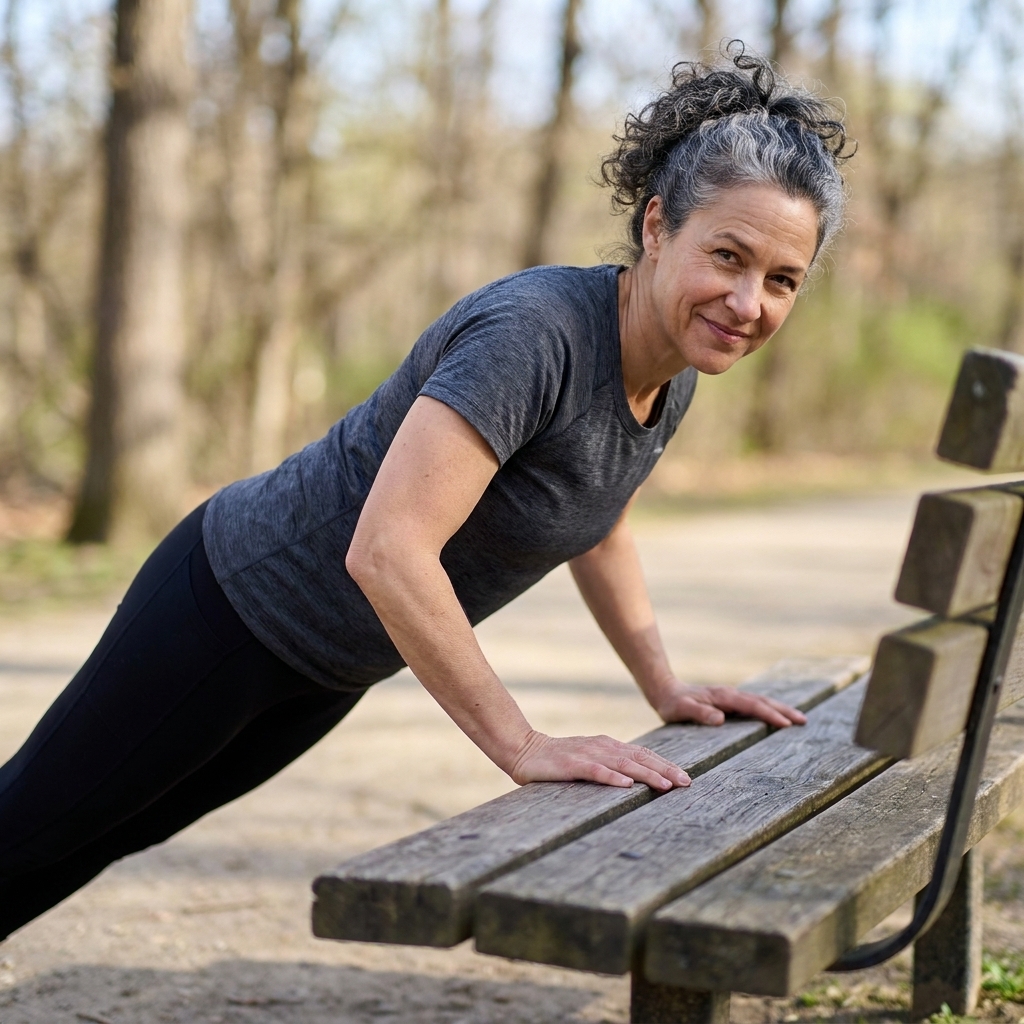
Why biomechanics likes it: The push-up is a closed-chain horizontal press (your hands stay fixed and your body moves as one unit). For many people, that setup lets the shoulder blades move naturally, including protraction at the top, which can feel more comfortable than forcing the shoulder blades “down and back” for every rep. It also asks your trunk to resist sagging, so your core is part of the lift.
What it trains
- Chest (pectorals)
- Triceps
- Front shoulder (anterior deltoid)
- Serratus anterior and scapular control
- Trunk stiffness (anti-extension)
Form cues
- Hands under shoulders or slightly wider, fingers spread.
- Think “ribs down” and “zipper up” to avoid low back sag.
- Lower with control until your chest is just above the floor (or as low as you can without shoulder pinching).
- At the top, gently push the floor away so your upper back rounds slightly. That is serratus doing its job.
Common mistakes
- Elbows flaring straight out to the sides
- Head reaching forward and neck collapsing
- Low back arching with the ribs popping up
Progressions
- Easier: Wall push-ups, countertop push-ups, then incline push-ups on a sturdy bench or couch.
- Standard: Floor push-ups.
- Harder: Tempo (3 seconds down), pause at the bottom, close-grip push-ups, feet-elevated push-ups.
2) Bulgarian split squat
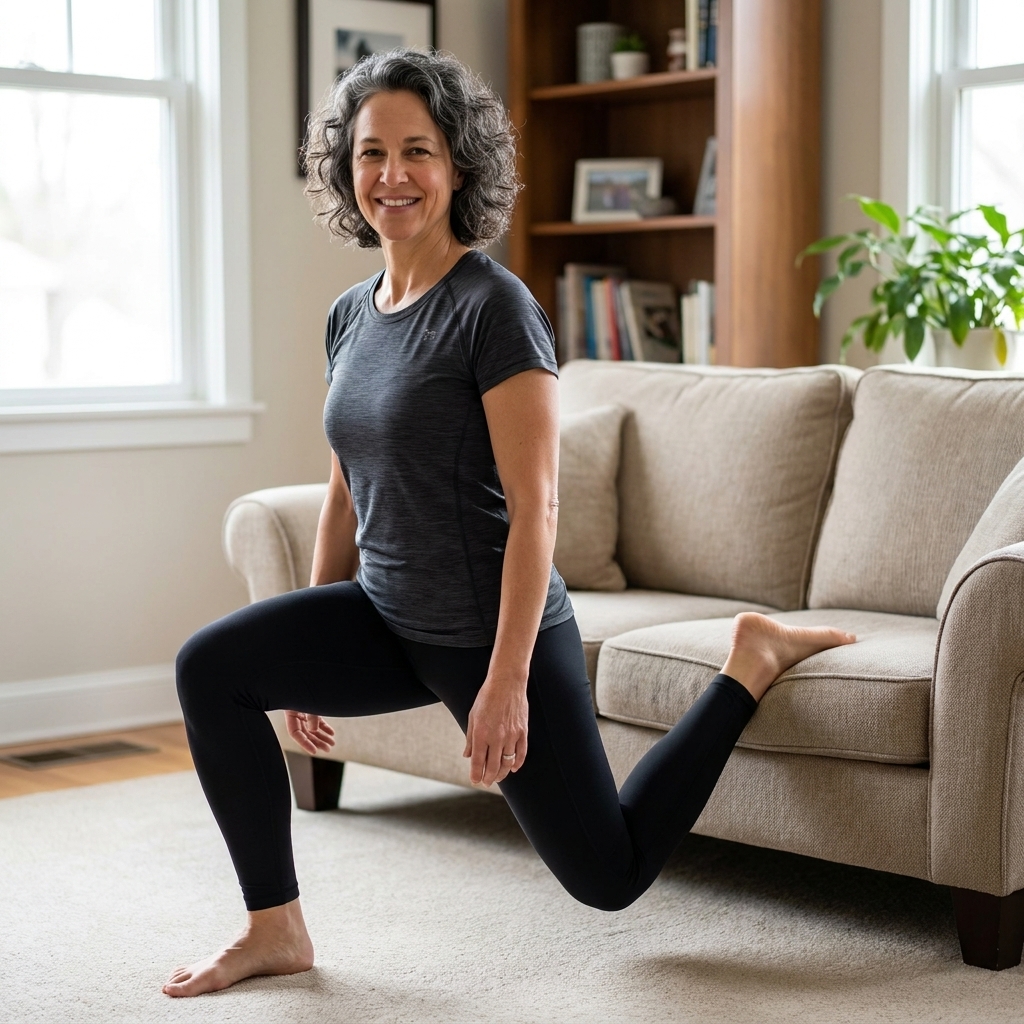
Why biomechanics likes it: Unilateral training lets you challenge the legs hard without heavy weights. It increases demands on hip stability and can help reduce left-right strength gaps. Because your base of support is smaller than a regular squat, your hips and trunk must actively control rotation and side-to-side drift.
What it trains
- Quads and glutes
- Hip stabilizers (especially glute medius)
- Adductors as stabilizers
- Balance and coordination
Form cues
- Front foot far enough forward that your front heel stays down.
- Keep your pelvis mostly square, avoid twisting toward the front leg.
- Track the front knee in line with the middle toes.
- Slight forward torso lean is normal and often more comfortable on the knee.
Common mistakes
- Front knee collapsing inward
- Pushing mostly off the back leg
- Overarching the lower back to “stay upright”
Progressions
- Easier: Split squat with back foot on the floor, hold a wall or chair for balance.
- Standard: Rear foot elevated split squat using a couch or sturdy chair.
- Harder: Slow eccentrics, 1.5 reps (down, halfway up, down, full up), add a backpack load.
3) Single-leg RDL
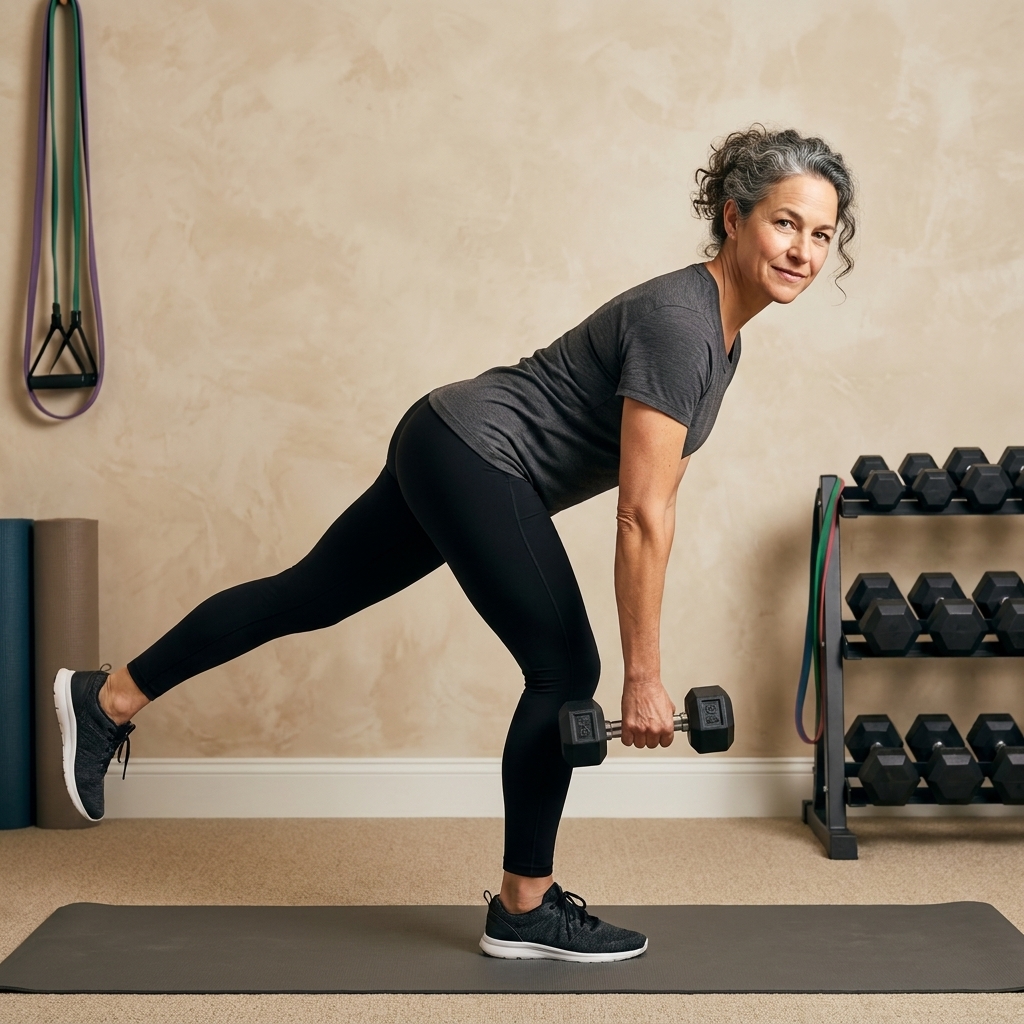
Why biomechanics likes it: Many people train “legs” but skip hinging mechanics, which is a missed opportunity for posterior chain strength and back resilience. The single-leg RDL teaches hip loading while your trunk resists rotation. You get hamstring and glute work plus balance, often with less axial loading than heavy squats.
What it trains
- Hamstrings and glutes
- Spinal erectors as stabilizers
- Foot and ankle stability
- Hip control (anti-rotation)
Form cues
- Soft bend in the standing knee.
- Push hips back like you are closing a car door with your butt.
- Keep your hips level. Imagine headlights on your hip bones pointing to the floor.
- Stop the descent when you feel a strong hamstring stretch, not when you “touch the floor.”
Common mistakes
- Rounding through the back to reach lower
- Hip opening to the side as the back leg lifts
- Locking the standing knee straight
If you struggle to feel the hinge
- Wall hinge drill: Stand 6 to 10 inches from a wall, reach hips back until you tap the wall, then stand tall. Repeat 8 to 10 times.
- On-ramp option: Glute bridge for 8 to 15 reps to learn “hips do the work.”
Progressions
- Easier: Kickstand RDL (back toes on the floor for support), use a wall for fingertip balance.
- Standard: Bodyweight single-leg RDL.
- Harder: Add load with a backpack or household object, pause at the bottom, slow 3 to 5 second descent.
4) Pull-up or inverted row
Why biomechanics likes it: Most home workouts overemphasize pushing and under-train pulling. Training a strong pull pattern can support shoulder comfort for many people by building the upper back and helping you balance weekly push and pull volume. Technique and dosage still matter, so aim for clean reps and progress gradually.
What it trains
- Lats (latissimus dorsi)
- Mid-back (rhomboids, mid and lower traps)
- Biceps and forearms
- Scapular control and strength
Form cues (pull-up)
- Start from a dead hang if your shoulders tolerate it. Do not hang into pain.
- Set your shoulder blades gently down, then pull.
- Pull your elbows toward your ribs, not behind you.
- Think “chest up, ribs calm.” Avoid flaring the ribcage to cheat.
- Control the lower. The eccentric phase builds strength quickly.
Form cues (inverted row)
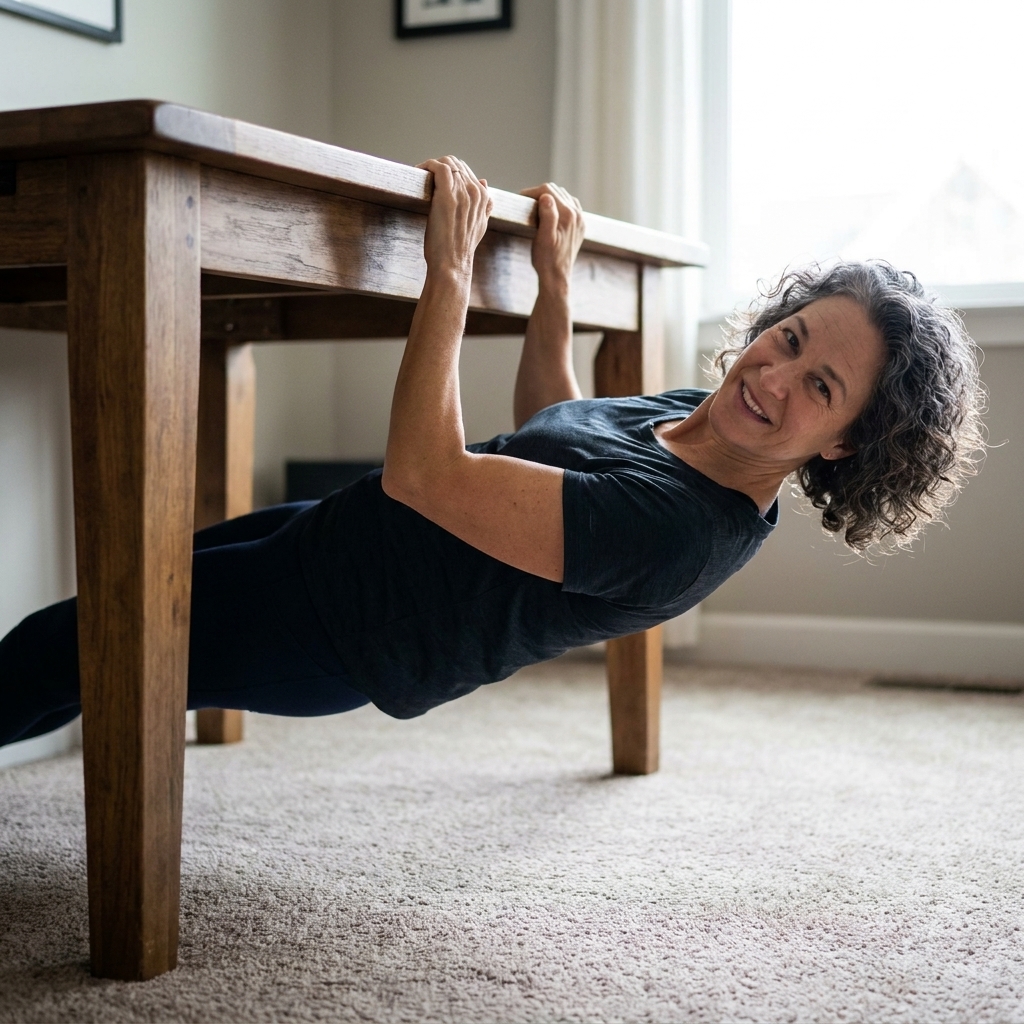
- Keep your body in a straight line like a plank.
- Pull your chest to the edge of the support or handles.
- Pause for one beat at the top to avoid momentum.
Safety note for home rows
If you use a table, it must be truly solid and heavy, with no wobble. Test it before you get under it, and avoid lightweight or unstable furniture. Safer options include suspension straps anchored to a rated door anchor, a sturdy railing, or a low bar.
Progressions
- Easier: Inverted row with knees bent, or band-assisted pull-ups.
- Standard: Full-body inverted row, or strict pull-ups or chin-ups.
- Harder: Feet elevated rows, slow eccentrics, pause reps, adding a backpack for rows.
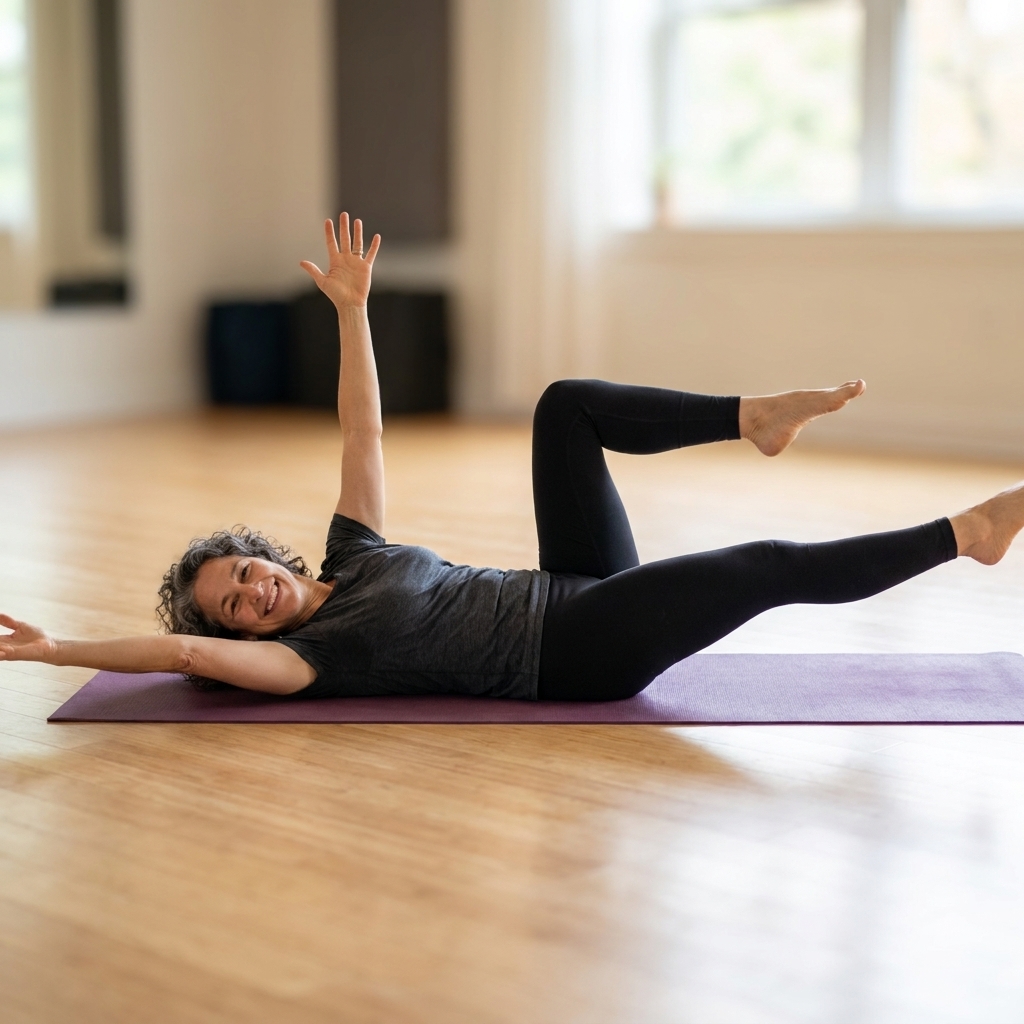
5) Dead bug
Why biomechanics likes it: “Core” is not just about flexing your spine with crunches. In daily life, your trunk often needs to resist movement so your arms and legs can generate force safely. The dead bug builds deep anterior core bracing and teaches you to keep your pelvis and ribs stacked, a skill that carries over to squats, push-ups, and running.
What it trains
- Deep trunk bracing and endurance
- Hip flexor control
- Coordination between breathing and bracing
Form cues
- Lie on your back, knees bent to 90 degrees, arms to the ceiling.
- Exhale fully like you are fogging a mirror, feel the ribs soften down.
- Press your lower back gently into the floor without jamming or over-tilting.
- Move opposite arm and leg slowly, only as far as you can without your back arching.
Progressions
- Easier: Heel taps only, or reduce range of motion.
- Standard: Opposite arm and leg extensions.
- Harder: Longer lever (straighter leg), slower tempo, or hold a light household object overhead.
6) Bear crawl
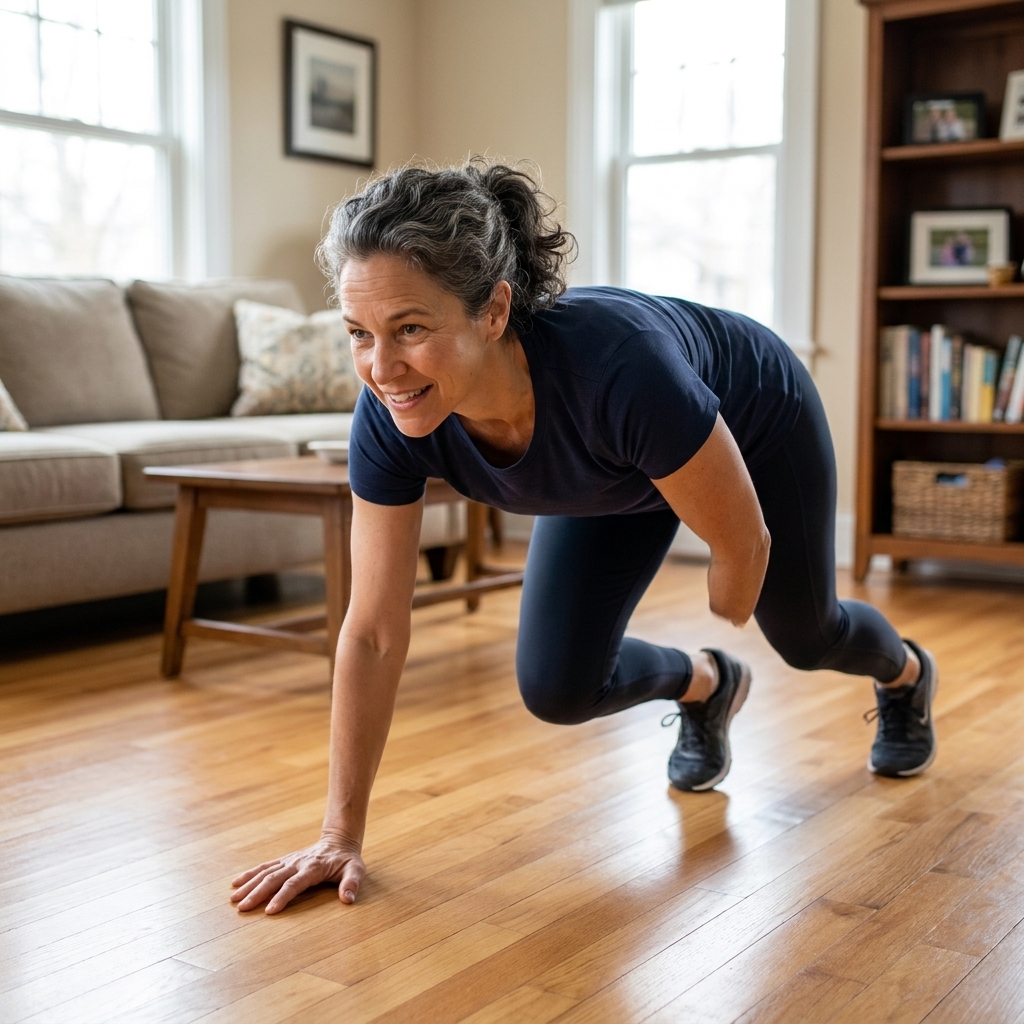
Why biomechanics likes it: Crawling looks simple, but it demands shoulder stability, hip control, wrist tolerance, and trunk stiffness while moving. It is also self-limiting in a good way. When your form breaks, you feel it immediately. Think of it as strength plus conditioning without needing a jump-heavy workout.
What it trains
- Shoulders and serratus anterior
- Hip flexors and quads
- Trunk stability (anti-rotation and anti-extension)
- Coordination and aerobic capacity, depending on pace
Form cues
- Hands under shoulders, knees under hips, then lift knees 1 to 2 inches off the floor.
- Keep your back flat and ribs tucked, eyes down a few feet ahead.
- Move opposite hand and foot together, slow and quiet.
- Start with short distances. Quality first.
Progressions
- Easier: Bear hover hold for 10 to 30 seconds.
- Standard: Forward and backward bear crawl for 10 to 20 steps.
- Harder: Slower tempo, longer sets, add a pause every 2 steps, or crawl uphill on a gentle incline outdoors.
Optional swap: loaded carry
If you want a true “carry” pattern, you can swap bear crawls for a suitcase carry using a heavy backpack or one grocery bag. Walk 30 to 60 seconds per side, stay tall, and do not let your torso lean.
How to build a workout
You can train all six as a circuit, or pair them into supersets. Here is a simple, joint-friendly structure I like for most people.
How hard should sets feel?
Pick a variation that lets you finish your set with 1 to 3 reps in reserve. You should feel like you worked, but you should not be grinding sloppy reps.
Option A: 3-round circuit (30 to 40 minutes)
- Push-up: 6 to 15 reps
- Inverted row or pull-up: 4 to 12 reps
- Bulgarian split squat: 6 to 12 reps per side
- Single-leg RDL: 6 to 12 reps per side
- Dead bug: 6 to 10 slow reps per side
- Bear crawl: 10 to 20 steps forward, then back
Rest 45 to 90 seconds between movements as needed. If your goal is strength, rest a bit longer. If your goal is general fitness, keep it moving but do not rush the reps.
Option B: Strength pairs (25 to 35 minutes)
- Pair 1: Push-up + Inverted row, 3 to 5 sets
- Pair 2: Bulgarian split squat + Single-leg RDL, 3 to 4 sets
- Finisher: Dead bug + Bear crawl, 2 to 3 rounds
Sample week
If you want a simple plan you can actually follow, here are two options.
3 days per week
- Mon: Option A circuit
- Wed: Option B pairs
- Fri: Option A circuit (or repeat Option B)
2 days per week
- Tue: Option B pairs
- Sat: Option A circuit
Progression tips
You do not need extreme workouts to progress. You need repeatable workouts.
- Add reps first: Build to the top of a rep range before making the exercise harder.
- Then add time under tension: Slow down the lowering phase or add pauses.
- Then add load if you want: A backpack with books can be plenty for split squats and rows.
- Respect joints: Mild muscle burn is okay. Sharp joint pain is not a badge of honor.
Nurse-to-human reminder: The best plan is the one you can do on a mediocre day, not just your best day.
Form and safety
Shoulders
If push-ups or pull-ups pinch, reduce range of motion, use an incline, and focus on slow control. Shoulder comfort varies from person to person. Many people feel better when they build scapular control and avoid letting the head and shoulders drift forward.
Knees
For split squats, adjust stance length and torso angle until the front heel stays down and you can control the descent. Knee travel over the toes is not automatically dangerous, but pain is a signal to modify.
Wrists
For bear crawls and push-ups, try turning hands slightly out, warming up wrists, or using push-up handles or fists if that feels better. Build tolerance gradually.
When to get help
If you have an acute injury, post-surgical restrictions, new neurologic symptoms, or persistent pain that does not improve with simple modifications, it is worth checking in with a clinician or physical therapist.
FAQ
Are bodyweight exercises enough to build muscle?
Yes, especially for beginners and intermediates. Muscle growth responds to mechanical tension and progressive overload. With bodyweight training, overload can come from harder variations, more range of motion, slower tempo, pauses, and higher total volume.
How often should I do this workout?
Two to four days per week works well for most schedules. If you are starting from scratch or feeling burned out, begin with two days and build from there.
What if I cannot do a pull-up?
Start with inverted rows, band-assisted pull-ups, and slow negatives. Your back and arm strength will climb faster than you think when you practice consistently.
Do I need to feel sore for it to be effective?
No. Soreness can happen, but it is not the goal and it is not a reliable marker of progress. Look for improved reps, smoother form, and better recovery.
Bottom line
If you want a minimalist home program grounded in real mechanics, these six moves are a strong foundation: push-up, Bulgarian split squat, single-leg RDL, pull-up or inverted row, dead bug, and bear crawl. They recruit a lot of muscle, reinforce joint-stacked positions, and scale for real life.
If you want, pick two moves today, do one set each with beautiful form, and stop. That is not “too little.” That is how sustainable fitness starts.